Note-taking methods

For effective note-taking methods along with a brief description of each. These methods can be adapted to suit different learning styles and purposes.
1. Cornell Method
![]()
The Cornell Method is a systematic format for condensing and organizing notes. In the fast-paced world of learning and information overload, effective note-taking can make all the difference. One of the most efficient methods for organizing and retaining information is the Cornell Method. This systematic approach not only helps in capturing detailed notes but also promotes active engagement and better retention. Let’s delve into how the Cornell Method works and how you can implement it in your study routine.
Steps:
- Cue Column: Write keywords, questions, or main ideas here.
- Note-taking Column: Take detailed notes during lectures or while reading.
- Summary Section: Summarize the main points in your own words.
- Prepare:
- Draw the layout on your notebook page or use a pre-printed template.
- Write the course name, date, and topic at the top of the page.
- Record:
- Use the Note-taking Column to jot down important facts, ideas, and concepts.
- Be attentive and focus on key points that the lecturer emphasizes.
- Abbreviate when necessary to save time.
- Reduce:
- After the session, review your notes and identify the main ideas and concepts.
- Write these cues in the Cue Column as questions or keywords.
After the Lecture or Study Session:
- Recite:
- Cover the Note-taking Column and try to recall the details using the cues in the Cue Column.
- This active recall process helps reinforce memory.
- Reflect:
- Think about the material and its significance.
- How does it relate to what you already know? Why is it important?
- Review:
- Summarize the notes in the Summary Section.
- Review your notes regularly, focusing on the cues and summary to refresh your memory.
Benefits:
- Enhanced Organization
- Improved Comprehension and Retention
- Efficient Review
- Active Engagement
Tips :
- Stay Consistent
- Be selective
- Personalized
- Review Regularly
2. Outline Method

In effective note-taking is crucial for academic success and efficient information retention. One of the most popular methods is the Outline Method, known for its simplicity and logical structure. This method helps organize notes hierarchically, making it easy to review and understand the relationships between concepts. Here’s a concise guide to mastering the Outline Method.
How to Set Up Your Notes
- Main Topics: Write the main topic or idea at the left margin.
- Subtopics: Indent slightly to write subtopics under each main topic.
- Details: Indent further to list supporting details or explanations under each subtopic.
Steps to Take Effective Outline Notes
- Prepare Your Page: Start with a blank page and create a heading for the lecture or reading material, including the date and subject.
- Record During the Lecture or Reading:
- Main Topics: Identify and write down the main topics covered.
- Subtopics: Under each main topic, note down the subtopics discussed.
- Details: Add supporting details, examples, and explanations under each subtopic.
- Organize Hierarchically:
- Use bullet points, numbers, or letters to signify different levels of information.
- Keep the structure consistent for clarity.
Benefits:
- Organizes information logically.
- Easy Review
- Flexibility
Tips:
- Be Consistent
- Focus on Key Points
- Use Abbreviations and Symbols
3. Mind Mapping

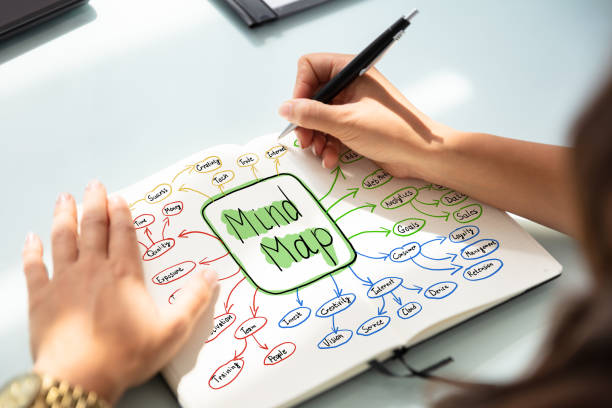
Mind mapping is a visual thinking tool that helps structure information, enabling better understanding, analysis, and synthesis of ideas. This technique leverages a graphical method to represent concepts, promoting creativity and improving memory retention. Mind Mapping is a visual technique that involves creating diagrams to represent ideas and their connections. It starts with a central idea and branches out to related subtopics and details.
History of Mind Mapping
The concept of mind mapping was popularized by Tony Buzan in the 1970s. Buzan, an author and educational consultant, advocated for the use of mind maps as a way to enhance learning and creativity. However, the roots of mind mapping can be traced back to ancient philosophers like Porphyry of Tyre and Leonardo da Vinci, who used similar techniques for organizing their thoughts.
Steps:
- Start with a Central Idea: Write the main topic in the center of the page.
- Add Branches: Draw branches from the central idea to subtopics.
- Using key words: Write down keywords or short phrases on each branch to describe the sub-topics.
- Incorporate Colour and Images: Use different colour for different branches and include images to make the mind map visually appealing and memorable.
- Sub-branches: Add further branches to detail each subtopic.
- Expand and refine: Continuously refine and update the mind map as needed with the help more sub branches.
Applications of Mind Mapping
- Education: Students and teachers use mind maps for note-taking, studying, and lesson planning.
- Business: Professionals use mind maps for project planning, strategic thinking, and meeting management.
- Personal Development: Individuals use mind maps for goal setting, decision making, and personal organization.
- Writing: Authors and writers use mind maps for brainstorming ideas, outlining plots, and organizing research.
Tools for Mind Mapping
- Manual Mind Mapping: Traditional pen and paper method, allowing for a tactile and personal touch.
- Digital Mind Mapping Software: Tools like MindMeister, XMind, and FreeMind offer advanced features such as collaboration, cloud storage, and multimedia integration.
Benefits:
- Enhances creativity and memory.
- Provides a clear visual overview of the material.
4. Charting Method

The Charting Method involves creating columns and rows to organize information into categories. This method is especially useful for comparing and contrasting data.
Steps:
- Set up a table: Create columns for categories such as dates, events, definitions, etc.
- Fill in information: Place information into the appropriate cells.
Benefits:
- Excellent for organizing large amounts of data.
- Facilitates comparison and analysis.
5. Sentence Method
The Sentence Method involves writing every new piece of information on a separate line, which results in a series of short, concise sentences.
Steps:
- New information: Write each new fact or idea on a new line.
- Numbering: Optionally, number the sentences for better organization.
Benefits:
- Simple and quick to use.
- Suitable for recording detailed information.
6. Mapping Method

The Mapping Method is similar to mind mapping but more linear, with a primary focus on how information connects in a hierarchical manner.
Steps:
- Main idea: Write the main idea at the top or center.
- Branches: Draw branches for subtopics directly related to the main idea.
- Details: Add further branches for supporting details.
Benefits:
- Visualizes the structure of the material.
- Helps in understanding the flow of information.
7. Boxing Method

The Boxing Method involves dividing the page into sections or boxes, each containing different topics or themes.
Steps:
- Create boxes: Draw boxes on the page.
- Fill boxes: Write related notes within each box.
Benefits:
- Keeps related information together.
- Reduces clutter and enhances focus.
8. Flow Notes Method

Flow Notes is a flexible method where notes are written in a way that mirrors the thought process, often using arrows, doodles, and connections.
Steps:
- Start with a main idea: Write the main idea or topic.
- Flow with thoughts: Allow your thoughts to flow naturally, connecting ideas with arrows and annotations.
Benefits:
- Encourages free-thinking and creativity.
- Captures complex ideas and their relationships.
Each of these methods has its own strengths and can be chosen based on the subject matter, personal preference, and the specific context in which you are taking notes. Experiment with different methods to find the one that works best for you.
